Microsoft Teams allows you to work more effectively as a team. It offers a convenient way to share files with your colleagues and hold conversations about current progress. You can organise your conversations and files into different topic areas called Channels.
By combining the best of Skype for Business, Outlook, and OneDrive, Microsoft Teams enables team collaboration by using:
- Conversations to encourage chat within a Team, rather than email
- Files to store your work and share within the Team
- Channels to organise your Conversations and Files, tasks and other tools
- Microsoft Teams app to access your work on any device
Watch this video to explore the features of Microsoft Teams:
What do I need to know?
Here’s a rundown of some important things in Teams:
Who can be part of a Team?
You can easily invite anyone who has a Hull York Medical School IT account. You can also invite external users by giving them guest access. Here’s a link for further information: Guest Access
Teaching and Learning
Whilst you can add students as Members of a Team, your Team Collaboration Space is not intended to replace Blackboard or other teaching resources. If you are interested in helping to explore how HYMS could use Office 365 and incorporate best practice in teaching and learning, contact us: help@hyms.ac.uk
Data security
If you’re using sensitive data supplied as part of a research contract, ensure that you are aware of the requirements of the data provider, who may not agree to datasets being stored or shared via Microsoft OneDrive or Teams.
Public/Private Teams
You can create either Public or Private Team Collaboration Spaces. Public teams allow access to all Hull York Medical School users (staff and students), so we strongly advise against creating these unless absolutely necessary. Private teams are only visible to users who have been invited to participate. You will need to be a Member or Owner of a Team to participate.
Using Teams
As a Member or Owner you can access your Team using a web browser, mobile or desktop app. Within Teams, there are a number of different options from the main menu:
Menu
By default, the menu is a vertical toolbar on the far left of the screen, where you can switch to another view or to an installed app within Microsoft Teams.
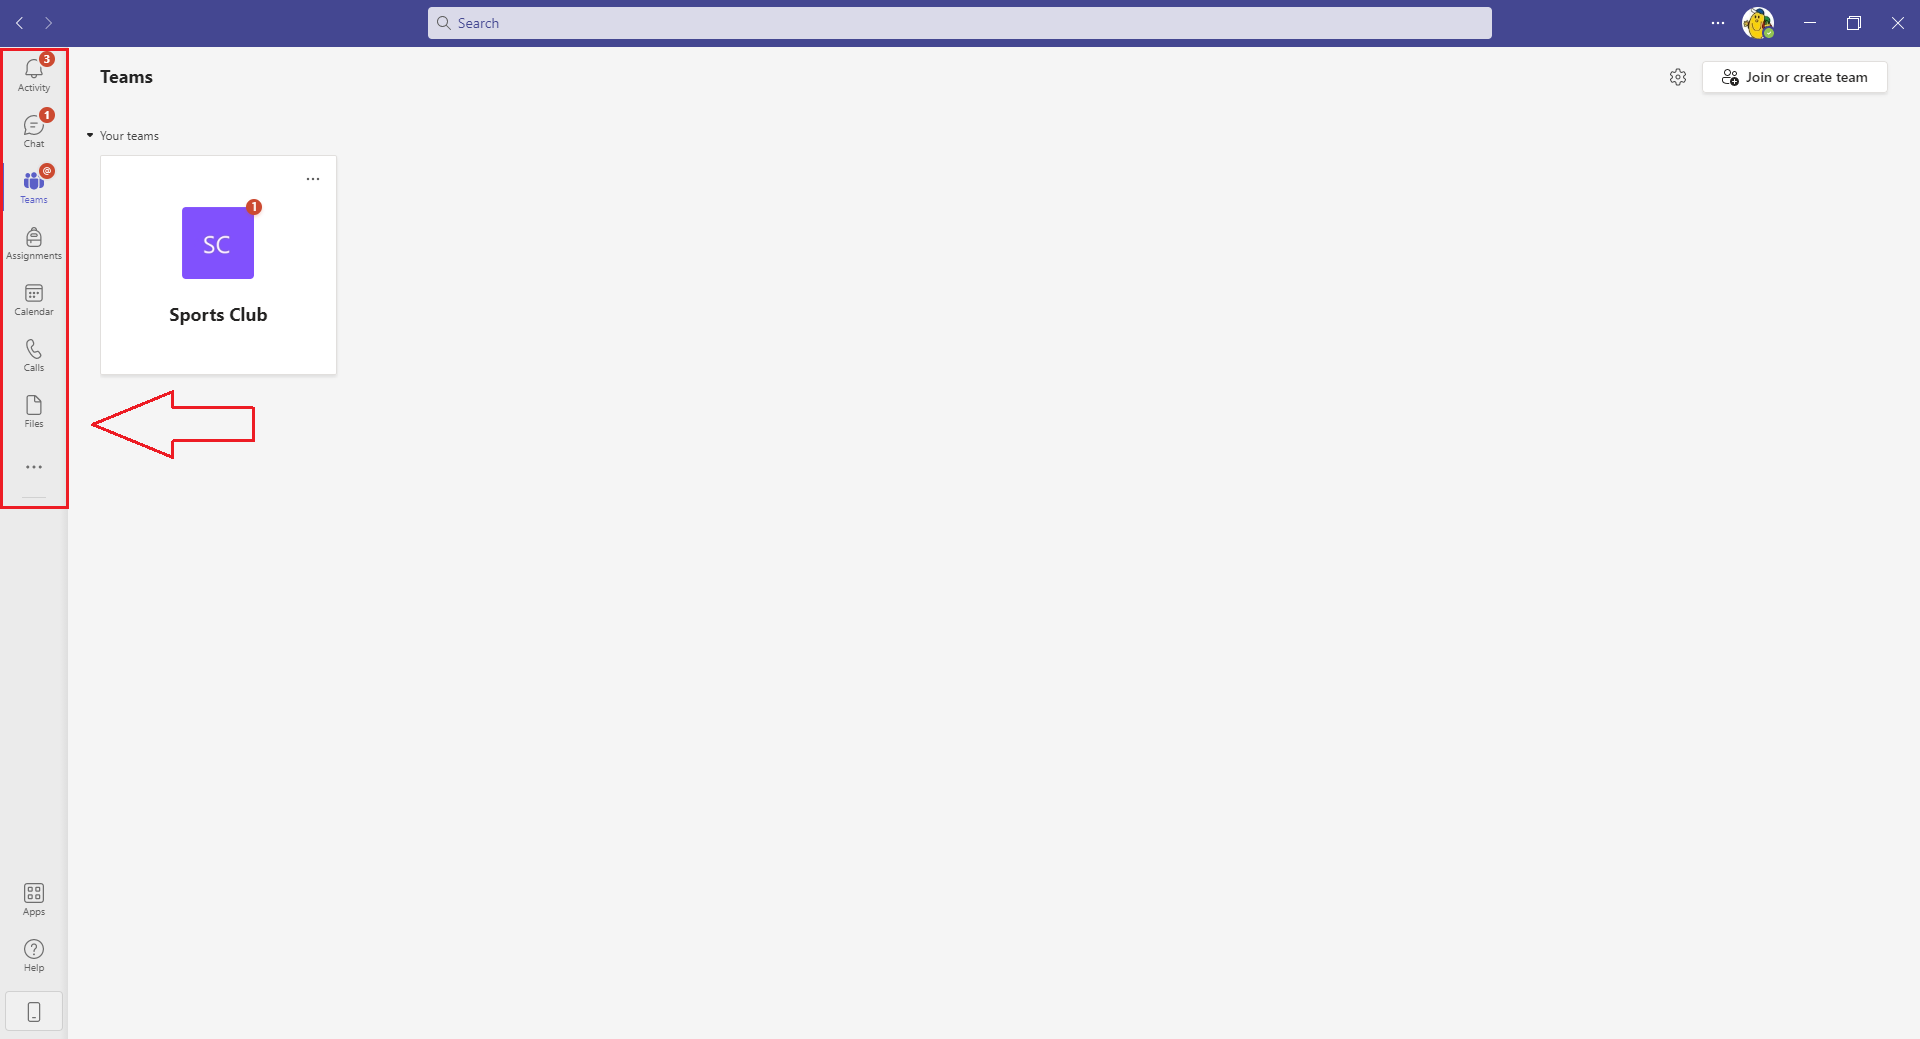
The toolbar buttons correspond to the views available in Teams, such as Activity, Teams, and Calendar:
Activity
Check the Activity to catch up with what’s been happening in Teams whilst you’ve been away or where you have been mentioned in a conversation.
- Keep track of your conversations (Microsoft help)
Chat
Chat allows you to use using Instant Messaging with your colleagues, similar to Skype for Business, but within the Teams app.
- Chat (Microsoft help)
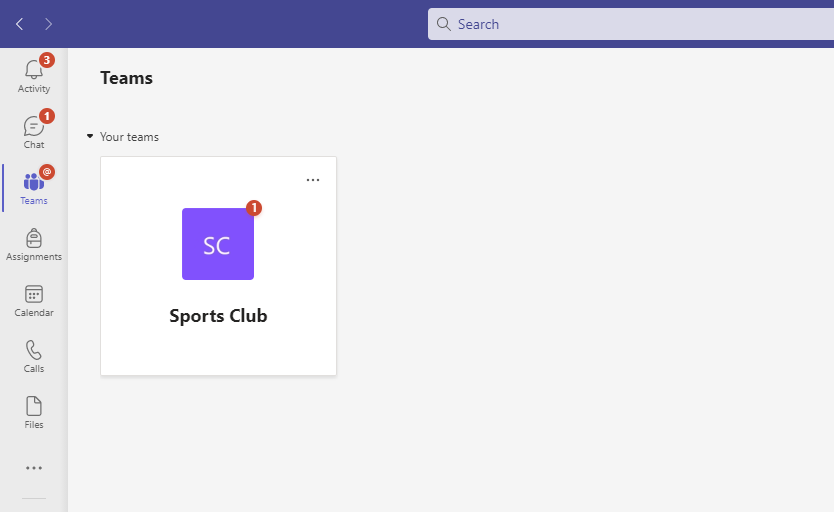
Teams
This is the heart of the Teams app, where you can collaborate with your colleagues. By defauly, all the Teams you are a member of will appear as tiles that you can click on. You can join in conversations, work on your files and use other tools.
- Teams and Channels (Microsoft help)
Within each Team you can use features including Channels, Conversations & Tabs.
Calendar
Within the Calendar view, you can see the Teams calendar overlaid with your personal calendar. You can switch between a daily or weekly view, and you can schedule a meeting with everyone in your Team.
- Meetings and calls (Microsoft help)
Calls
The Calls view lets you see your call history, manage contacts, listen to voicemails, and make calls. You can search for members of your organisation and add them to your Contacts, and add them to Speed dial too.
-
Calls and devices (Micosoft help)
Files
This is an overview of all the files you have in Office 365 including your OneDrive and the files you have access to in your Teams. You can search for any file or view files you have worked on recently.
- Files (Microsoft help)
Channels, Conversations & Tabs
Within the Teams view you can see all of your Teams as tiles. Click on a tile to open a Team and use features such as Channels, Conversations & Tabs to communicate and collaborate:
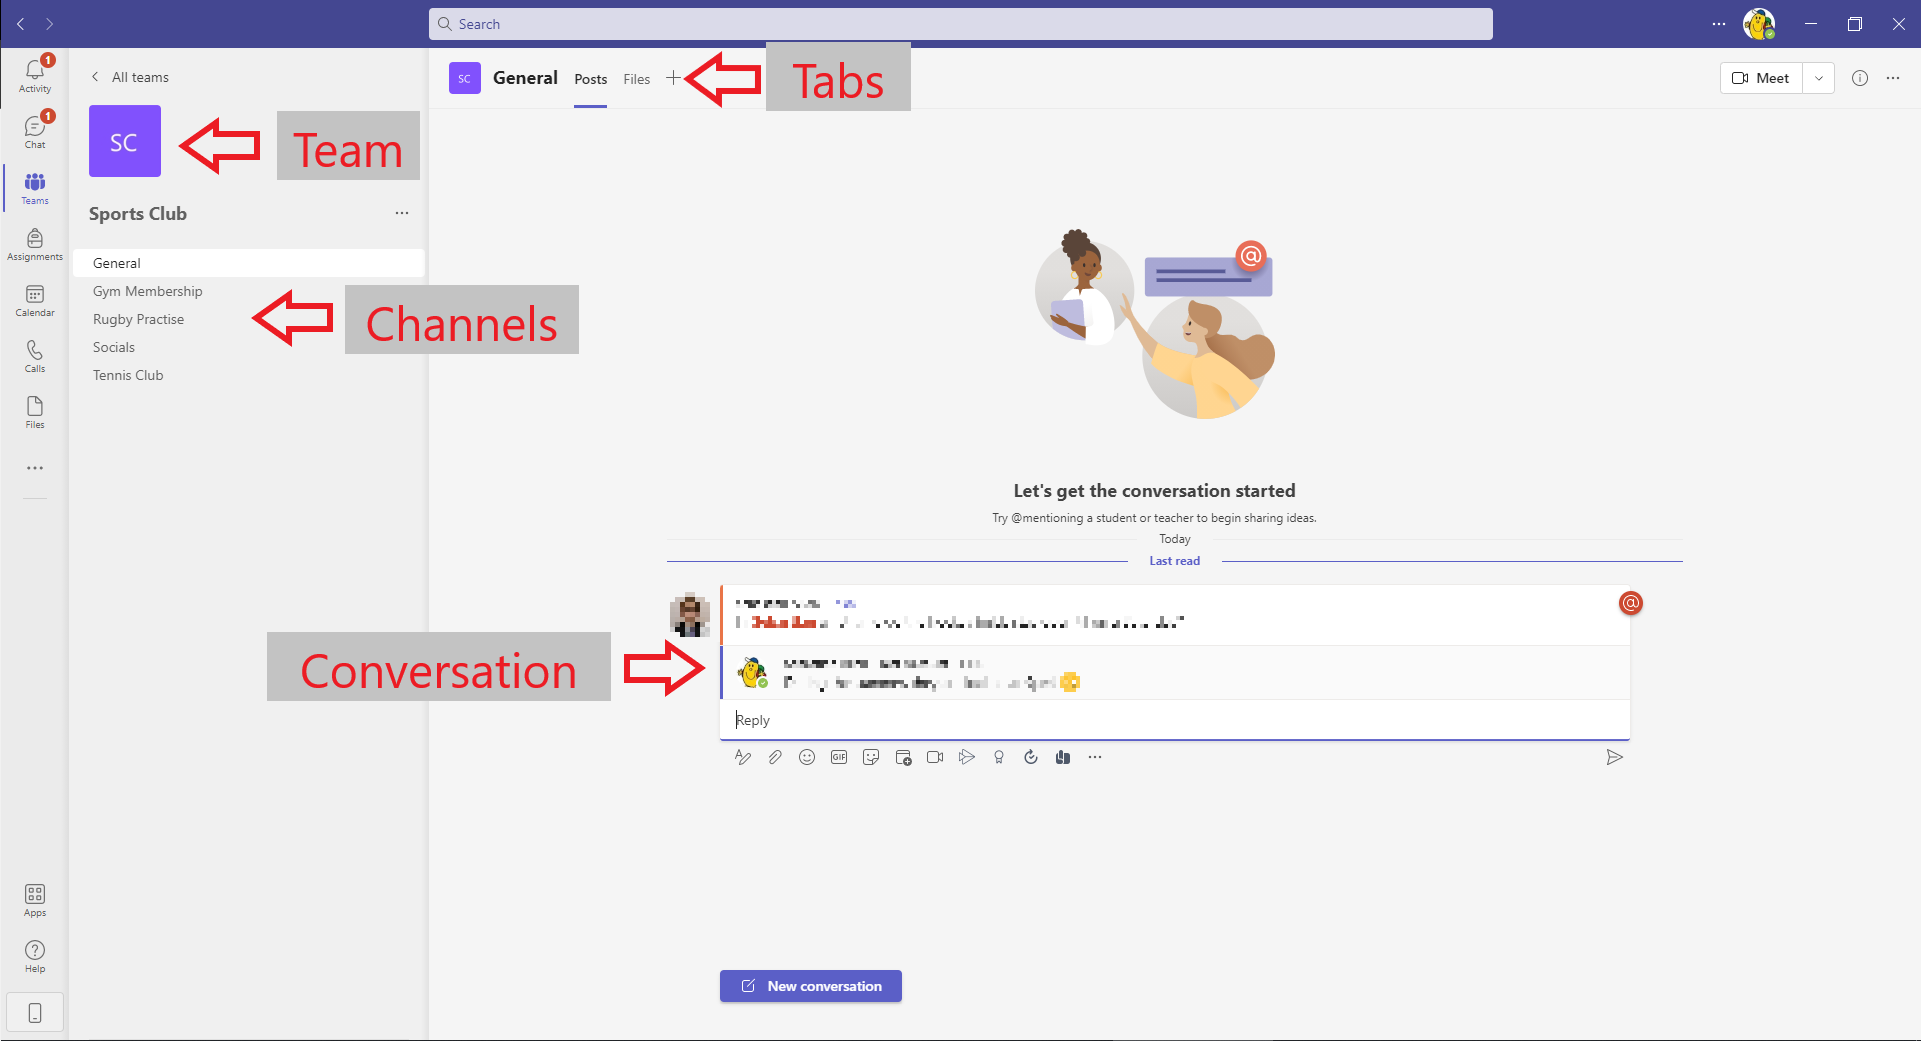
Within a Team you’ll see a list of Channels. Channels help to organise conversations by topic. Each Channel has its own space for Conversations and its own row of Tabs:
Channels
A Channel is a way to organise your Team. For example, you could label these as different elements of a project you are working on or activities of your department or team.
- To access a Channel, choose the Teams icon
- The channels within a Team are listed on the left-hand side
- You can also create a Channel or access a Channel that someone else in your team has created.
See Microsoft help for Work in Channels.
Conversations
When you click on a Channel you will initially see the Conversation tab. This is where you can chat with your colleagues (similar to Instant Messages in Skype for Business), but the messages are visible to all Members of the Team.
You can also mention someone to draw their attention to your post. When you post the message, the people you mention will receive a notification within Activity.
Tabs
By default, Conversations and Files tabs are shown in each Channel. You can add other Tabs by clicking on the + at the end of the row of tabs, to pin important documents or enable other features.
Communicating in Microsoft Teams
Each channel within a Team has its own Posts thread. This is where you can start a new conversation.
Conversations
Conversations in channels are organised by date and then threaded:
Start a new conversation
If you wish to discuss a topic or project with a team, you can do so by starting a new conversation.
- Select the channel you wish to start the conversation in.
- At the bottom of the posts page, type your message into the box. If you want, you can attach a file to accompany your message.
- Hit Enter (or select the paper aeroplane icon) to send the message.
Reply to a conversation
Replies in threaded conversations are displayed under the initial conversation, making the discussion easy to follow.
- Find the conversation you want to reply to.
- Select Reply and add your message.
- Hit Enter or select the paper aeroplane icon. Your message will now be posted.
@mention
You can communicate directly with team members by mentioning them in the message. You can @mention a channel, a team, a person, or several people at once. These users will receive a notification if they’re mentioned in Teams communication.
- In the Reply or New Conversation box, type the @ symbol, then type the first few letters of the person’s first name.
- From the Suggestions list, select the person you wish to reference in the conversation.
Notifications
You can easily see when someone @mentions you or replies to a thread you started. A superscript number appears on the Activity and Chat icons and an @ appears on the Teams icon.
- Select the Activity icon.
- To view conversations that apply to you, select Notifications. Select Recent to view up-to-date Team conversations.
Teams: Members & Owners
Members & Owners
A Team is made up of Owners and Members, each with their own set of permissions and responsibilities:
Members
A Member can create files and contribute to conversations within the Teams area of a Collaboration Space. However, they cannot:
- Directly share a file outside of the Collaboration space – Owners can do that for them
- Add other members. Instead, members can invite others, which will require an Owner to approve them to join
Owners
Owners manage the membership of the Collaboration Space. They will approve who can join and when it is necessary to remove members. They can share files outside of the team to anyone with a HYMS IT account.
As an Owner you can change a number of settings including:
- Setting the name and description of the Team Collaboration Space
- Adding and removing Members and Owners
- Controlling what Members can do within a Team Collaboration Space
An Owner can use all the same features as a Member, in addition to their ability to manage the Team.
Responsibilities of an Owner
There can be ten Owners for each Collaboration Space, so it should be possible to share the administration of a Team Collaboration Space.
Collectively, the Owners of a Team Collaboration Space are responsible for the information stored and those who have access to it.
As an Owner you will need to:
- Manage the membership of the Team Collaboration Space, including:
- Review ongoing membership, and removing members when they no longer require access
- Manage sharing with people who are not members of a Team Collaboration Space
- Be responsible for the security of files within the Team Collaboration Space
- Ensure the permissions of the team are correct and that only permitted users have access
Add members
There are a couple ways which an Owner can add members to the team:
If you’re an Owner, go to your teams list, click the More options button next to the Team name, then click Add members:
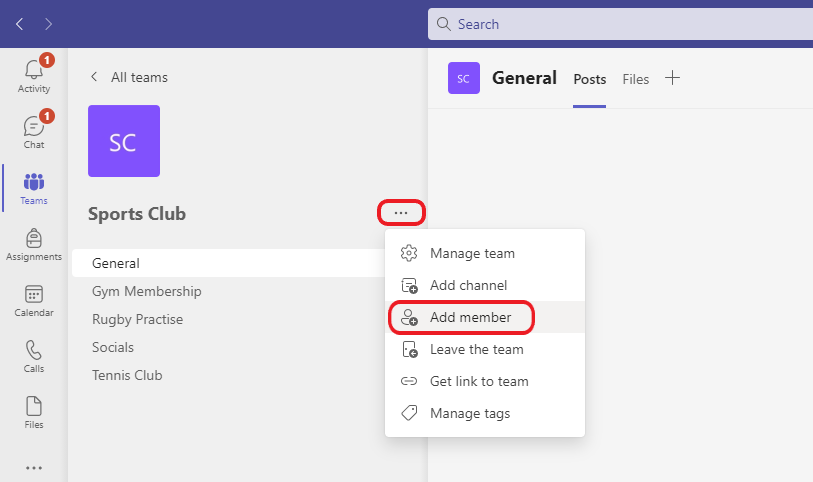
Another option is to click Manage team, and add people in the Members tab.
To make these changes you will need to edit the Team:
- In Teams, right click on … for a Team where you are an Owner
- Click on Edit team
You can also set team members’ permissions for channels and tabs, which is found in Manage team
- In Teams, right click on … for a Team where you are an Owner
- Click on Manage team
Microsoft Help for managing your team
File Sharing
Uploading files to Teams
- Each channel in Teams has a Files area
- You can drag and drop files from Explorer
- You can also use the upload files button
- You can post files in the team conversations
Where are files stored?
Files are stored securely in the channel/team. Files are accessible anywhere with internet access (there is no need to connect to the university network).
Who can access files?
- Only team members, guests and owners have access to files
- Once on Teams, the files do not belong to any specific person, and any member of the team can read, edit or delete them
- To see team members, go to the … next to the Team name and click manage team (all members can do this)
Collaborative editing
- Many people can work simultaneously on a file
- You can work on Microsoft Office documents directly within Teams
- Office 365 shows you who’s got the file open, and any changes happening by different users in real-time
- A new version is created every time the document is closed, not every time a change is made during live editing
- You can roll back to a previous version
Find previous versions
Open the file in SharePoint and then:
- Go to document menu (…)
- Then Version history
- From there, you can view or restore previous versions
If the file was deleted, you can find it again in the recycle bin:
- Open the file in SharePoint
- Find the Recycle Bin in the left menu
- Select the file and click Restore in the bar above
Downloading files
You can download a local copy of a file with the Download button. This will not update the original on Teams, so avoid this when multiple people are working on a file as versions won’t be in sync.